
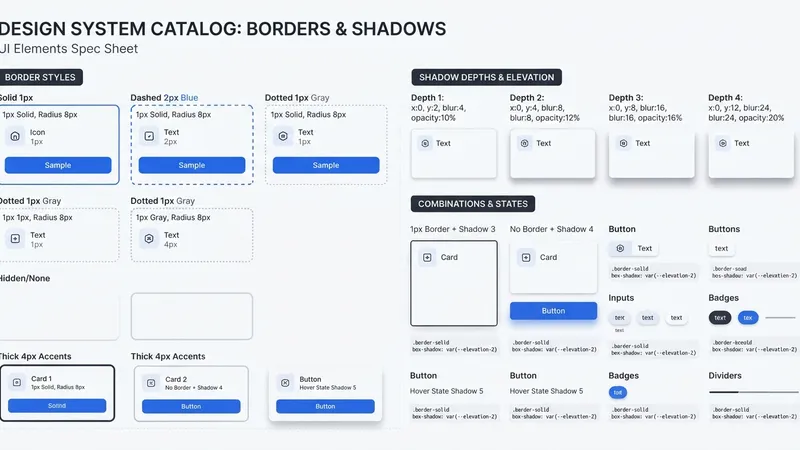
Divi 5 lets you save just the border, or just the shadow, as a reusable preset — not the whole module. That's what an Option Group Preset is, and it's the difference between a preset system that scales and one that turns into fifty near-identical card styles.
The reusability is the point: a Border preset built on a Column works on a Section, Row, Image module, Group module, or anything else exposing that group. Same for Box Shadow.
TL;DR: Build Border and Box Shadow presets either from a live element's Design tab (hover the group header → preset icon → New Preset From Current Styles) or from scratch in the Preset Manager → Group tab. Bind their values to Design Variables. Name by role (Border: Card, Shadow: Subtle). Keep the two groups independent unless you deliberately nest them. Retrofit old pages with Inspector, Find And Replace and Extend Attributes.
Bind Them to Variables First
Before you save any preset, decide where the raw numbers live. Design Variables hold colours, numbers, fonts, images and links — so:
- Border preset: Colour Variable → border colour. Number Variables → border width and radius.
- Shadow preset: Colour Variable → shadow colour. Number Variables → blur, spread and vertical position.
The layer model: variables store raw values, option group presets apply them, nested presets combine them, element presets deliver full patterns. Skip the variable layer and your presets hardcode values you'll have to hunt down later. It's the same argument as Divi 5's global variables generally — you're just applying it one level up.
Creating a Border Preset
From a live element:
- Click an element — a Column works well, as do Sections, Rows, Groups, Images and Blurbs — and open Design.
- Scroll to the Border option group and expand it.
- Set Border Radius. The four corner fields are linked by default, so one value hits all corners. Unlink for per-corner control, and use a Number Variable if you have a radius scale.
- Set border width and colour. Both apply to all four sides by default — unlink sides for a bottom-only border, a left accent, or a top-and-bottom divider.
- Choose border style. Solid for card outlines, image frames and form fields. Dashed or dotted for secondary containers, placeholders and decorative separators.
- Hover the Border group header → click the preset icon → New Preset From Current Styles → name and save.
From the Preset Manager: click the Preset Manager icon in the left sidebar → Group tab (group and element presets are managed separately) → select Border → Add New Preset. The Preset Preview panel lets you set radius, width, colour, sides and style without touching a live element.
That second route is underrated. Building presets against a real element means you're designing while looking at one specific context, which is how you end up with a "card border" that only works on cards.
Names that hold up: Border: Card, Border: Subtle, Border: Divider, Border: Accent Left, Border: Image Frame.
Creating Shadow Presets
Same two routes — element Design tab → Box Shadow, or Preset Manager → Group tab → Box Shadow. Divi ships built-in shadow options as starting points.
| Control | What it does |
|---|---|
| Horizontal Position | Shifts the shadow left or right |
| Vertical Position | Shifts it up or down |
| Blur Strength | Softness vs sharpness |
| Spread Strength | Expands or contracts; negative keeps it from spilling past the element |
| Shadow Color | Colour and opacity |
| Box Shadow Position | Outer or inner |
Vertical Position and Blur Strength carry most of the visual weight. Small values read grounded; large values read lifted. That's the whole vocabulary of depth in two sliders.
Inner shadows suit inset form fields, pressed states, toggles and recessed panels — anywhere something should look pushed in rather than raised.
Name by weight and context: Shadow: Subtle, Shadow: Medium, Shadow: Floating, Shadow: Inset, Shadow: Dark Section. Keep light-section and dark-section shadows as separate presets, because a shadow tuned for white will vanish on charcoal.
Overrides, Defaults and Combining
Overriding is fine and expected. A preset specifying a 4px border can be locally overridden to 3px while colour, radius and style stay preset-driven. The rule: if you make the same override twice, it's a new preset.
Defaults are for the boring recurring cases — standard card borders, default image frames, form field borders, subtle section shadows, default container radius. Set the preset as default for its option group and stop thinking about it.
Combining is where separation of concerns pays off. A card built from four independent presets — Border: Card (outline and radius), Shadow: Subtle (depth), Background: Surface, Spacing: Card Padding — lets you change the shadow across the whole site without touching the border. One giant "Card" preset can't do that.
For nesting: build Border: Radius Standard, Border: Card Outline and Shadow: Subtle, then an Element Preset: Card containing them — each still editable at its source. That's the same mechanism covered in stacking and nesting presets.
Three Tools for Retrofitting an Old Site
This is the part that makes the feature usable on real projects rather than only new builds.
- Inspector — right-click a section → Inspect to review applied styles collectively instead of opening every module one at a time.
- Find And Replace — swap a static border colour for a Colour Variable, change a repeated 1px width to 2px, or fix an outdated shadow colour. Use Only Replace Identical Fields carefully so a radius number doesn't get replaced in unrelated fields.
- Extend Attributes — right-click the correct element → Extend Attributes → extend the Border group, Box Shadow group, or both → set scope and target element types → apply.
Global editing afterwards is straightforward: Preset Manager → Group tab → find the preset → edit in Preset Preview → save. Every element using it follows. The manager also duplicates presets for variations, sets defaults, deletes unused ones and reorders the ones you reach for most.
My Take: Three Shadows Is Enough
Here's my one strong opinion: you need exactly three shadow presets, and the fourth one is a mistake.
Subtle, Medium, Floating. That's a complete depth system. I've built over 100 Divi sites and I have never once needed a fourth level of elevation that a client could distinguish from the third.
What actually happens without a limit is depth inflation. Cards get Subtle. Then the featured card needs to stand out, so it gets Medium. Then the pricing table needs to beat the featured card, so it gets Floating. Then the modal needs to beat the pricing table, and now you're inventing Shadow: Extra Floating and the page looks like everything is levitating at slightly different altitudes.
Three levels, plus Inset for pressed states and a dark-section variant. Five presets total, and the fifth is just the first three recoloured. Every element on the site picks one. If two things need to look different, change their background, not their elevation.
Same discipline as keeping gradients to three. The constraint is the design system.
Straight Answers
What is an Option Group Preset? A preset saving one settings group (Border, Box Shadow) rather than a whole module, reusable on any element exposing that group.
How do you save a border preset? Style an element, hover the Border group header, click the preset icon, choose New Preset From Current Styles.
Can you build one without a live element? Yes — Preset Manager → Group tab → Border or Box Shadow → Add New Preset, using Preset Preview.
What are the box shadow controls? Horizontal Position, Vertical Position, Blur Strength, Spread Strength, Shadow Color, Box Shadow Position.
Can you override a preset locally? Yes, and the rest of the group stays preset-driven. Repeat the same override twice and make it a preset.
How do you retrofit an existing site? Inspector to review, Find And Replace for known values, Extend Attributes to push a group across a scope.
The Last Word
Borders and shadows are the two settings people restyle most and systematise least. Getting them into presets bound to variables means "make the cards a bit softer" is one edit rather than an afternoon.
Name by role. Keep the groups independent. Three shadow levels. Check the result on both light and dark backgrounds before you commit, because that's where half of all shadow presets quietly fail.
Divi 5 gives you the Preset Manager and three retrofit tools, which means even a messy existing site is fixable. If yours has forty card variations and you'd rather not count them yourself, I'll count them.
This is a summary of Elegant Themes' original post, "How To Create Reusable Border And Shadow Presets In Divi 5". All credit for the original content goes to Elegant Themes.